
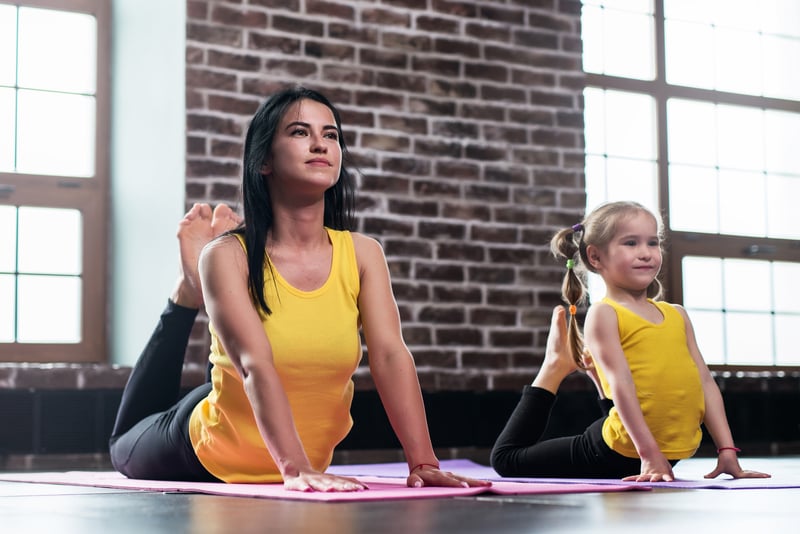
Yoga doesn’t need to take all your time, nor do you need to be super flexible or totally Zen to benefit. Try adding these simple beginner yoga stretches to your routine for some surprising health benefits.
Quick Review: What is Yoga?
If you’re not really sure what yoga is, let’s have a brief review. The word “yoga” means to yoke or bring together the body and the spirit. Widely used as a method of relaxation and meditation, it is practiced around the world by people of all ages and backgrounds.
Yoga is comprised of a series of gentle moves, stretches, and holds which use breathing techniques designed to relax and remove stress from the body as they improve strength, balance, and flexibility. Through this type of movement, yogis purport a better mind and body connection. Some cultures even view yoga as a religious practice, although performing yoga simply for exercise and health benefits is much more common and mainstream. And doing beginner yoga stretches everyday can help you keep your joints limber as you age.

What are the Benefits of Yoga?
Yoga has numerous benefits. Not only does it share many of the benefits of other forms of regular exercise, it also boasts additional benefits that other exercise may not provide, such as:
- Reduced stiffness
- Increased balance and flexibility
- Decreased anxiety
- Improved mood
- Better digestion
- Stress and tension relief
- Increased circulation
- Enhanced mind-body connection
- Deeper and more restful sleep
- Proper breathing
- Helps you focus on your body and not on your problems
- Can be a form of meditation
- Providing a spiritual outlet
- May help with weight-loss efforts
- Reduced cortisol levels
- Relief of asthma symptoms
Try these Beginner Yoga Stretches
Sounds good, right? Even if you have a regular exercise program, yoga can be a great addition.
Ready to add a little yoga to your day? Try some of these soothing and relaxing beginner yoga stretches:
1. Child’s Pose (Balasana)—begin by sitting with your legs folded underneath you with your ankles beneath your butt, the tops of your feet flat on the floor, and sitting tall. Bend forward at the waist and bring your chest down toward the floor as you stretch your arms straight out in front of you. (You may want to separate your thighs, so your knees are farther apart than your ankles if that’s more comfortable.)
Relax in this elongated position and feel a good stretch through your back and shoulders, hips and front of the legs. After a count of ten, return to a seated position.
2. Reclining Butterfly (Supta Baddha Konasana)—begin by sitting on the floor with your knees bent, with the knees pressed in opposite directions with your feet together as if your legs are butterfly wings. Gently lie backwards and allow your knees to relax and fully open as your legs drop toward the ground on either side. You can place a block under each knee if that is more comfortable.
Hold this position and feel a nice stretch through your hips and inner thighs as you breathe deeply for a few minutes. Then bring your knees back together before sitting upright again.
3. Tree Pose (Vrksasana)—this pose requires a little balance. Begin by standing with your feet about hip-width apart with your hands on your hips. Maintain this stance as you slowly shift your weight onto your left foot and bend your right leg and rotate at the hip, so your right knee is bent and out to the side. You can hover your right toes just above the ground or take your right foot and slide it up the inside of your left leg toward your knee or even up to the inner thigh. (Just make sure you don’t have your right foot resting on your left knee.)
The idea is to be able to balance while placing your foot on the standing leg and then to continue balancing as you hold this stance. You can slowly raise your arms out to your sides and all the way above you until you can press your palms together. Alternately, you can spread your arms apart as if they’re tree limbs. It may take some practice to balance! Once you complete the right side, try it on the left as well.
4. Crescent or Low Lunge (Anjaneyasana)—this pose will have you start in a standing position with your feet together or hip-width apart (whichever is most comfortable for you). Next, you’ll want to bend the hips and allow your hands to swoop down toward the floor on either side of you. Breathe out and take a giant step backwards with your right leg. At the same time, bend your left knee until your right thigh is parallel with the ground. (You can think of this as a long lunge or runner’s lunge with the left leg bent with the front of the shin in a straight line over the ankle and the foot flat on the floor. The right leg will be straight behind you and balanced on just the ball of your foot and toes.)
Lastly, place your hands on your front knee and push your body up into an upright position, pull in your belly, and draw in your ribs. Then raise your arms up above your head with your arms straight and palms facing each other. Hold this pose for 5 breaths or up to a minute and then repeat on the opposite side.
5. Cobra Pose (Bhujangasana)—this pose will stretch the front of your body. Begin by lying face down on the mat with your legs straight and your ankles hip-width apart. Place your palms on the mat directly under your shoulders, roll your shoulders up and back (so your shoulder blades squeeze together), and keep your spine straight and your head inline and elongated.
Then squeeze the elbows in toward the torso as you push your torso upward as you slowly straighten your elbows and open the heart, keeping your shoulders down and relaxed. (It’s easy to tighten the shoulders as you lift up, so breathe consciously and relax the shoulders even as you push your hands solidly into the earth and spread your fingers.)

You’ll feel a nice stretch in the front of your body, opening up the collar bones, and creating a nice, long line from the hips to the top of the head as you straighten your arms. (It takes time to be able to build up and straighten the arms completely. Remember, it’s a practice that you build upon as you continue to open up the chest and build strength in the back. Don’t try to just muscle your way into the pose.) You can hold the pose for a count of ten and then return to the start.
6. Garland or Squat Pose (Malasana)—this pose will open up your hips and back and allow you to feel a good stretch throughout the region. Start by squatting down with your feet flat on the floor (you may need to place your feet pretty far apart as if doing a sumo squat). Bend your arms and press your palms together, using your elbows to push your knees out to either side. Hold this stretch until you feel all the tension in your body escape.
7. Wind-Relieving Pose (Pawanmuktasana)—this pose will feel great on your back and can help your digestive system. Lie on your back, bend your knees, and fold to bring them up until your thighs rest on your chest. Wrap your arms around your legs and lift your head off the mat to try to touch your forehead to your knees as you round your back.
Hold this position for a few seconds before releasing, lowering, and straightening the right leg. Then, bring the right leg back up into your arms and straighten and lower the left leg. Bring the left leg back up to your chest and hold the final pose for a few counts before releasing.
You Might Like


