How to Build a Perfect Holiday Charcuterie Board (in 6 Steps)

If you have been struggling with how to prepare for the festivities this year, you are not alone. On the one hand, some folks are looking for simple ways to celebrate the holidays and indulge in their favorite foods. On the other hand, we may want to get a leg up on the #1 resolution on everyone’s list year after year—getting in shape. I mean, truth be told, for many of us, this entire year has been one big indulgence, and personally, I don’t need to test the elastic on my favorite pants any more than they have already been tested.
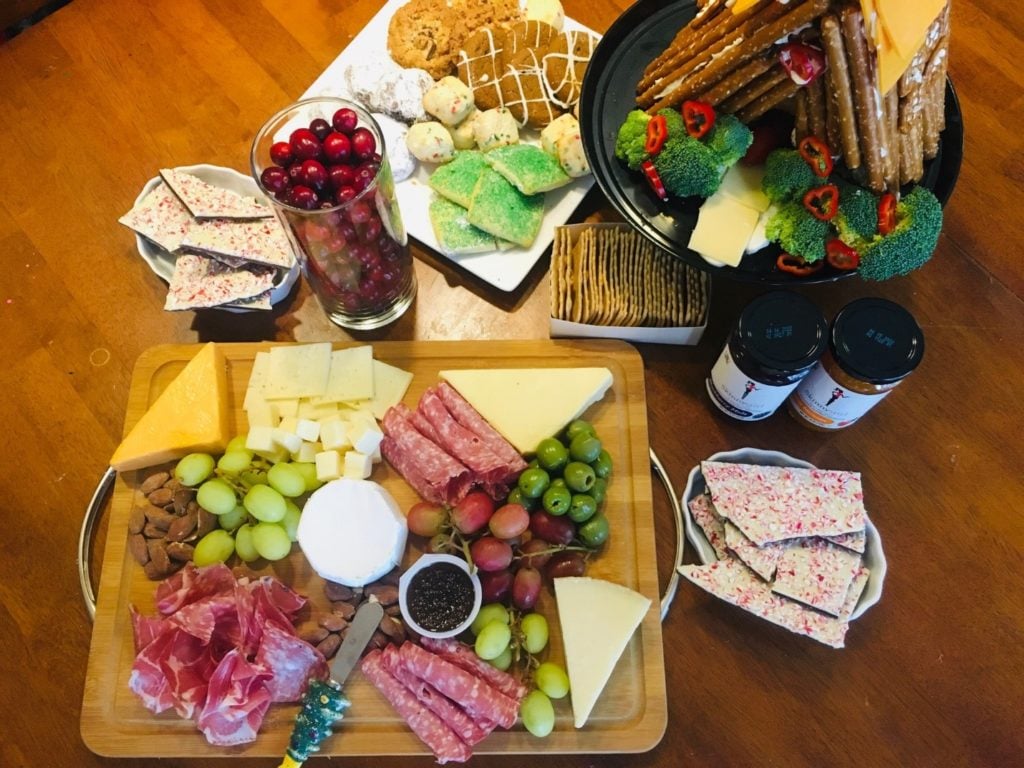
While it is tradition to share all of our baked goods with friends, family, and neighbors, this year I went with a more savory treat: a charcuterie board. And before everyone gets in a panic about having to share off of a communal plate (with people outside of their household), this can also easily be modified to be “jarcuterie” where you create individual jars for each person. Where there is a will, there is a way!
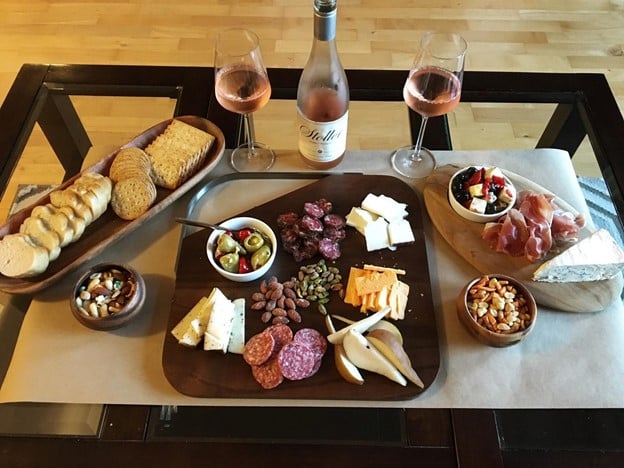
Charcuterie, pronounced shahr-ku-tuh-ree, is French for a type of cooking that’s devoted to prepared meat products, such as bacon, ham, sausage, and more. However, it has since become more than just meats, as we adapted the charcuterie board, turning it into an assortment of meats, cheeses, artisan breads, olives, fruits, and nuts, all artfully arranged on a serving board.
So how does one select the items that adorn the board? Allow me to share what I have learned.

Keys to the Perfect Holiday Charcuterie Board
Step 1: The Board & Prep
Before you can begin, it is crucial to select the right board. This can be a butcher block, a cutting board, or even a flat surface like a tray. Consider additional surfaces to separate meats if you are also serving some vegetarians or vegans. Some ingredients like mustard, jams, and other soft, spreadable condiments can be placed into small ramekins or serving dishes and placed either on the board or within close proximity. I would probably not opt for placing on the board as typically the board is reserved for dry items.
The only other helpful hint I have is to bring everything to room temperature before serving. This usually takes about an hour, and to be honest, I usually can’t ever wait that long.
BREAKING: US Doctor: “Eating This Every Day Can Snap You into Ketosis”
Step 2: The Meats
First up, selecting the meats. Since there are so many options to choose from, I like to include one or two cured meats and one or two cooked meats. The following are some that I like to use.
• Prosciutto, jamón Serrano, and jamón Ibérico are types of Italian cured pork legs that are salted and air-dried; Spanish Serrano uses a different curing process, but it has a comparable taste and texture.
• Spanish Lomo de cerdo (or “lomo” for short); Lonzo for the Italian version is made from cured pork tenderloin.
• Italian Bresaola; Cesina for the Spanish version is salted and air-dried beef tenderloin.
• Guanciale is bacon made from pork jowl. This meat is similar to pancetta, with a richer, porkier flavor.
• Filetto bacciato is a cured loin cut, wrapped in salami. When sliced, it’s often described as looking like “kiss-ready puckered lips.”
• Mortadella is essentially grown-up bologna. However, it’s richer, silkier, and more complex in flavor. In addition to distinctive fat marbling that looks like polka dots, some is made with black pepper or pistachios.
• Speck is a cured, smoked pork shoulder that originated in Germany. It’s similar to prosciutto but has subtle notes of juniper and smoke.
• Hard salamis (such as Salame di Felino, often praised as “The King of Salami”) can have sweet notes that are often combined with peppers and wine as a flavor counterpoint.
• Sopressata (technically a type of Italian salami) is typically more coarsely ground. Available in spicy or sweet styles as well as round or flattened pressed varieties.
• Smoked sausage or ham, such as kielbasa, brings additional richness and bitterness to the board. (I recommend including no more than one smoked meat.)
• Finocchiona is a salami made with fennel, which adds a sweet flavor.
• Capicola (or capocollo) is dried, salt-cured whole pork shoulder or neck. To create its typical tight texture, it’s pressed into forms.
Step 3: The Cheeses
• Manchengo, which comes from the La Mancha region of Spain. It’s a firm cheese with a lacy interior that’s made from sheep’s milk cheese. It has tangy, nutty, grassy flavors and is high in butterfat, which gives it a rich, decadent feel. Watch for the inedible waxy herringbone rind imprinted during the molding process.
• Gouda, a semi-hard cow’s milk cheese (though it can also be made with sheet’s and goat’s milk) that originated in the Netherlands. It has a nutty, buttery taste that’s a crowd-pleaser perfect for any holiday charcuterie boards. Gouda may be enriched with cream and then called a double-cream gouda. Young gouda has a mild flavor. As it ages, the flavor sharpens. If it’s covered in a waxy coating (as it typically is), the red or yellow denote a young gouda; black is used for an aged gouda.
• Any good cheese plate should include brie. I like triple cream brie, which has a butterfat content of at least 75%, for its extra creamy flavor.
• Originating in the English village of Cheddar, cheddar cheese is one of the most popular hard cheeses. The flavor can range from sweet and creamy to bitter and sharp. Typically, the more aged the cheddar, the sharper the flavor.
• Goat cheese has a wide range of flavors. It can taste delicate and mild or more pungent or even sweet. The classic French chèvre is probably the most well-known. This soft, spreadable cheese, which is often sold in a log-shaped, rind-free package, can be plain or rolled in herbs, pepper, or ash. It’s a great addition to cheese plates.
Step 4: The Fruits
Next up, some fruits/berries.
• Whether Honeycrisp, Granny Smith, Fuji, or Gala (or better yet, an assortment), thinly sliced apples pair with cheese perfectly. Green Granny Smiths, for example, are tart and crisp, so they work well with cheddar cheese. For a special treat, add a drizzle of honey.
• Berries like raspberries, strawberries, and blackberries also beautifully pair with a variety of cheeses. And they are also low on the glycemic index, so win-win.
• Grapes add a natural sweetness and pop of flavor to counteract the creaminess of the cheese. Both green and red seedless grapes are a beautiful addition. (Just keep them seedless.)
• Pears, like apples, wonderfully accompany the richness of cheese. Plus, because they’re mild in flavor, they allow the cheese to be the star.
• Apricots, dates, and figs add a dessert-like sweetness that’s perfect for freshening the palate. Plus, nothing screams holiday festivities like figs. I also like to add a fig jam because you can never have enough figs.
Step 5: The Salty Sides
Next you will want to select some salty items to sprinkle throughout. My ideas are nuts such as pistachios, almonds, and walnuts—perhaps even some candied nuts would work well.
I love a good deli olive or even an olive salad. These are always a superb addition to a meat and cheese platter. Don’t use canned olives. Trust me on this.
Step 6: The Crackers and/or Breads
Lastly, you will want to select an array of crackers and bread—think crostinis, flatbread crackers, and thinly sliced crackers. I recommend choosing plain crackers, so they don’t take over all the other the flavors on the board.
There is really no wrong way to build a charcuterie board, and you can never have too much. There are plenty of options for all of your “dieting” needs whether they be ketogenic, Mediterranean, Low Carb, or whatever you fancy. Have fun with it and be sure to share your creations with me.


