
Whether you’re currently following a ketogenic diet, or you’re looking to get started and need some direction, or you’re just looking for a “healthed-up” dessert, this is a recipe you’ll want to try. Wait… I take that back… you won’t just want to try it, you need to try it!
Staying within the recommended macro guidelines for a keto-friendly nutrition plan of 75% fat, 20% protein, and just 5% carbs is often a difficult task, especially when you are talking about dessert.
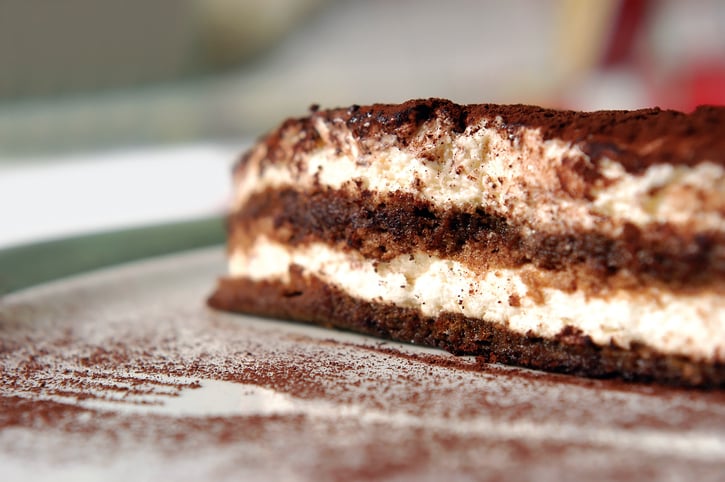
We are fortunate enough to have talked master ketogenic chef Shelley Wells into very graciously sharing with us her recipe for keto tiramisu. Believe me when I tell you, this is a culinary masterpiece!

Tiramisu in Italian means “lift me up” and is traditionally a layered dessert combining ladyfingers and mascarpone cheese served in a trifle bowl or a spring-form pan. Shelley has successfully transformed the calorie-dense, high-carbohydrate, and off-the-charts-sugar-loaded version into an amazingly delicious and healthy recipe that is right in line with the ketogenic guidelines.
Disclaimer: This keto tiramisu recipe is so darn good you might eat the whole thing. So make two!
Ketogenic Diet Tiramisu Recipe

“Ladyfinger” sponge-cake ingredients:
- 1 cup almond flour
- 1 cup coconut flour
- 4 Tbsps keto-friendly sweetener of choice (Shelly loves this combination for baking: 1 Tbsp xylitol, 1 Tbsp TheraSweet®, 1 Tbsp Truvia®, 1 Tbsp erythritol)
- 2 scoops BioTRUST® Low Carb Vanilla Cream protein powder
- 2 tsps baking powder
- 1 tsp baking soda
- 1 tsp xanthan gum
- 1/2 tsp salt
- 8 oz mascarpone
- ½ cup butter
- 3 large eggs
- 2 Tbsps water

- Preheat oven to 325 degrees.
- Combine all the above dry ingredients (the first 8, through salt) using a dry whisk to mix well.
- Heat the marscapone and butter in a microwave on low until cheese is soft and butter melted. Mix well.
- Mix the eggs into cheese/butter mixture.
- Mix ½ of the dry mixture into wet ingredients. Using a fork to mix, add second half of the dry ingredients and mix until just combined. Don’t over work.
- Sprinkle water over a sheet pan, and cover with a large sheet of parchment paper.
- Place batter onto parchment paper and spread out flat to the corners. I end up using my fingers and hands to get it even edge to edge.
- Bake for twenty minutes.
- Remove cake from the oven, and cover with parchment or a silicone mat. Flip over to cool on the counter.
- Stab each layer of the cake with a fork multiple times. About every half inch, “stick a fork in it.” Then continue to allow the cake to cool completely.
*While the cake is cooking, get started on the espresso bath and filling base below.
*This is when I’d recommend tackling the egg whites and cocoa powder dust.

Espresso bath ingredients:
- 1 cup cooled decaf espresso
- ½ cup MCT oil
- 1 oz Tia Marie coffee liqueur (This is optional but highly recommended. It’ll only add 1 g of carbs per serving.)
Directions:
1. Mix all ingredients together until incorporated. (You’ll need to mix again just before pouring over the prepared “ladyfinger” sponge cake.)
Filing ingredients:
- 8 oz mascarpone
- ½ cup butter
- ¼ cup heavy cream
- 1/4 cup Almond Roca sugar-free syrup
- 1 tsp almond extract
- 1 tsp vanilla extract
- 4 eggs, separated, yolks from egg white
- ½ tsp cream of tartar


Directions:
- Combine the first six filling ingredients (through vanilla extract), and heat in a double boiler over medium heat until melted. This is the base for the filling. Note: To create a double boiler, place a medium heat-safe bowl over a medium pot with about two inches of water. Bring to a simmer, but make sure the water does not touch the bottom of the bowl when boiling.
- Combine egg whites and cream of tartar and set aside.
- Whisk yolks until slightly fluffy.
- Add ¼ cup of the warm liquid to the egg yolks at a time to “temper” the eggs while whisking constantly. *If you don’t do this, your egg yolks will scramble when they come in contact with the hot double
boiler liquids, and you’ll have to start over. (Remember, you aren’t making egg drop soup.) - After adding one cup of the warm liquid to the yolks, you are safe to pour the yolk mixture into the double boiler.
- Continue to whisk until the custard is thick enough so when you run the back of a metal spoon though, each side stays separated instead of immediately coming back together.
- Remove the pan from the double boiler, and place on top of a large bowl containing ice.
- Whisk for about five minutes until cool.
- Beat egg whites until stiff. This step will probably take at least five minutes. Don’t stop until you lift up the beaters and a stiff peak stands up from the bowl. I did use my electric whisk for this step, but it takes longer than a traditional electric hand mixer.
- Fold the egg whites into the cooled base. *Make sure the filling base is cool before folding in the egg whites; otherwise, your filling will be dense and might be absorbed into the cake layer too easily.
- Your cream filling is now ready for assembly.
Assembly:
- Select your serving dishes carefully as you’ll want this to sit in the fridge for 24 hours before serving, and you don’t want to find out after you’ve assembled everything that it doesn’t fit!
- Cut the ladyfingers into four squares (two layers for two desserts). And place your first layer into two empty dishes. In my case, I selected two medium rectangular Pyrex dishes that have covers.
- Adjust the espresso “bath” according to the size of your cake layers. I used about ⅓ cup liquid per 4” x 6” cake. Bathe each ladyfinger layer with the espresso mixture.
- Then slather a thick layer of your creamy filling onto your first layer of ladyfingers.
- Add your second layer of espresso-bathed ladyfingers.
- Slather a second thick layer of creamy filling onto each dessert.
- Now you’re ready to dust with the cocoa powder (see below).

Cocoa dust ingredients:
• 1 Tbsp cocoa powder
• ½ tsp confectioner’s erythritol
Directions:
- Mix above ingredients and place in a sift. Sprinkle over the final layer cream filling for a finishing touch.
- Chill for 24 hours. (You can eat your dessert before that, but like lasagna, you REALLY want to wait. In this case, the “ladyfinger sponge cake” needs time to absorb some of the filling and become a little denser.)
- Serve cold, and enjoy your delicious dessert with a cup of freshly brewed coffee!

You Might Like


