
Push-ups for beginners almost sounds like an oxymoron, but it’s actually not. While you may not be able to drop and do 20 in the immediate future, you can undoubtedly improve your push-up game quickly. Let me show you how to do a push-up in no time at all.
What is a Push-Up?
The exercise is called “push-ups.” Pretty self-explanatory, right? However, there’s probably a bit more to them than you think. This mainstream body-weight exercise packs a powerful punch when it comes to building strength and stamina, shaping your upper body, and chiseling your core.
What are the Benefits of Doing Push-Ups?
Don’t avoid push-ups! Embrace them! While they may seem overwhelming and difficult at first, with a little consistent practice, you can get stronger and master them in no time at all—no matter what level you’re starting at now. And, you’ll be glad you did because pushups have many benefits:
- Build strength, and not just in your arms and chest, either. Push-ups require great core and back strength to support you during the movement.
- No cost. This body-weight movement is something you can pretty much do anywhere, any time. You don’t need to belong to a gym or pay a trainer to tell you to drop and give them 20.
- Efficient. If you want a quick and convenient workout, it doesn’t get much better than push-ups.
- No equipment needed. Since it’s a body-weight exercise, you don’t need any type of equipment to perform this movement.
- Build stronger bones. Because this is a weight-bearing exercise, it helps to strengthen your bones as well as muscles.
- Shape your chest and arms. Doing push-ups will help you tone and define your upper body.
- Get a stronger core. Because pushups require you to hold your body in a plank position, they help you tighten and strengthen your core.
- Strengthen the lower back. A strong back can help alleviate and even prevent back pain.

How to Do a Push-Up for Beginners
If you’re just starting out, you like all the benefits, and you’re ready to get started, here’s how to do a push-up:
First, there are several ways to get started, depending on how strong you are. You can start by pushing off of a wall or a raised surface like a chair, table, or even the stairs. Once you’re feeling strong enough to progress, try doing push-ups with your knees on the ground before moving on to a full-fledged push-up where you are essentially in the plank position.
Step 1: Wall Push-Ups
Start by standing a little further than arms’ length away from a wall. Face the wall and bring your arms up until they’re parallel with the ground, and lean forward to place your palms on the wall directly in front of your chest and shoulders (slightly wider than shoulder-width is great and a little bit easier). Slowly bend your elbows to move your upper body and chest toward the wall. Once your forehead and nose are about an inch away from the wall, push through the heels of your hands to straighten your arms and push your body back to the standing position.
Work your way up to a set of ten wall push-ups.
Step 2: Knee Push-Ups
Once you’re feeling ready to move onto the next phase, you can try some knee push-ups. Begin on your hands and knees on the ground or on a mat. Shift your body forward, so it’s angled but in a straight line from the knees to the head. Place your hands flat on the floor directly below your shoulders. Keeping your core tight and your booty in line (don’t let it drop down or stick up), gently lower your upper body to the ground by allowing your elbows to bend at a slightly outward angle. You may want to adjust your hands out further or closer together. Once your elbows are level with your shoulders, push back up to the starting position to complete one repetition.
Step 3: Incline or Bench Push-Ups
Now that you’ve mastered the wall and knee push-ups, it’s time to progress to the incline push-up. All this means is that you’re not completely parallel to the ground, but instead, your feet are on the ground while your upper body is elevated on a raised surface like a table or bench (stairs, large rocks, or any other elevated surface can work too). You’ll keep your back and knees straight and your core tight as you bend at the elbows to lower your torso to the surface. Again, push back through your hands to straighten your elbows and return to the starting position.
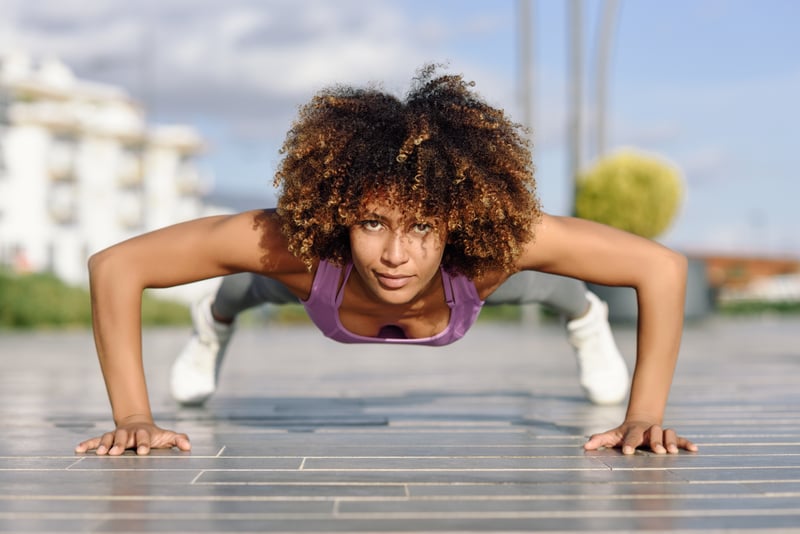
Step 4: Regular Push-Ups

Once you’re ready to go for a pushup, start on your hands and knees with your palms face down on the floor. Your hands should be placed slightly wider than shoulder-width apart. Next, straighten your legs and get up onto your toes. This is basically the “plank” position. Keep your legs and back straight and your core tight.
Next, bend at the elbows and allow your arms to bend as you lower your chest toward the ground. Your elbows should go outward slightly as they bend. (Don’t keep them right next to your body.) Once your chest touches the ground or your nose is very close to it, push back up through the heels of your hands to straighten your arms, lift your body, and return to the start
Notes: You may need to experiment with the exact angle of your elbows. Choose what’s most comfortable for you that doesn’t put additional strain on your elbow or shoulder joints. Keep your lower back tight and your abdominals contracted to support your body no matter which version of the pushup you are doing.
If you find pushups put too much strain on your wrists when your palms are flat on the ground, you can use pushup bars or simply a square or hexagon dumbbell in each hand (so they don’t roll as you perform the exercise) to lift your palms off the ground.
You Might Like


